DIY Guide: Build Your 125 Gallon Fish Tank Stand
To build a 125-gallon fish tank stand, you will need to measure and cut all the wood pieces accurately before assembling them with screws. A 125-gallon fish tank requires a sturdy stand to support its considerable weight.
If you’re an experienced diy enthusiast looking to save money and learn new skills, building a stand is an excellent project for you. Making your stand will allow you to customize the design to fit your décor and specifications. Nevertheless, building a robust tank stand requires careful planning and precise measurements.
In this article, we’ll show you how to build a 125-gallon fish tank stand from scratch. Whether you’re looking to build a simple or elaborate stand, the instructions we provide will guide you in the right direction. So, roll up your sleeves, grab your woodworking tools and let’s get started!
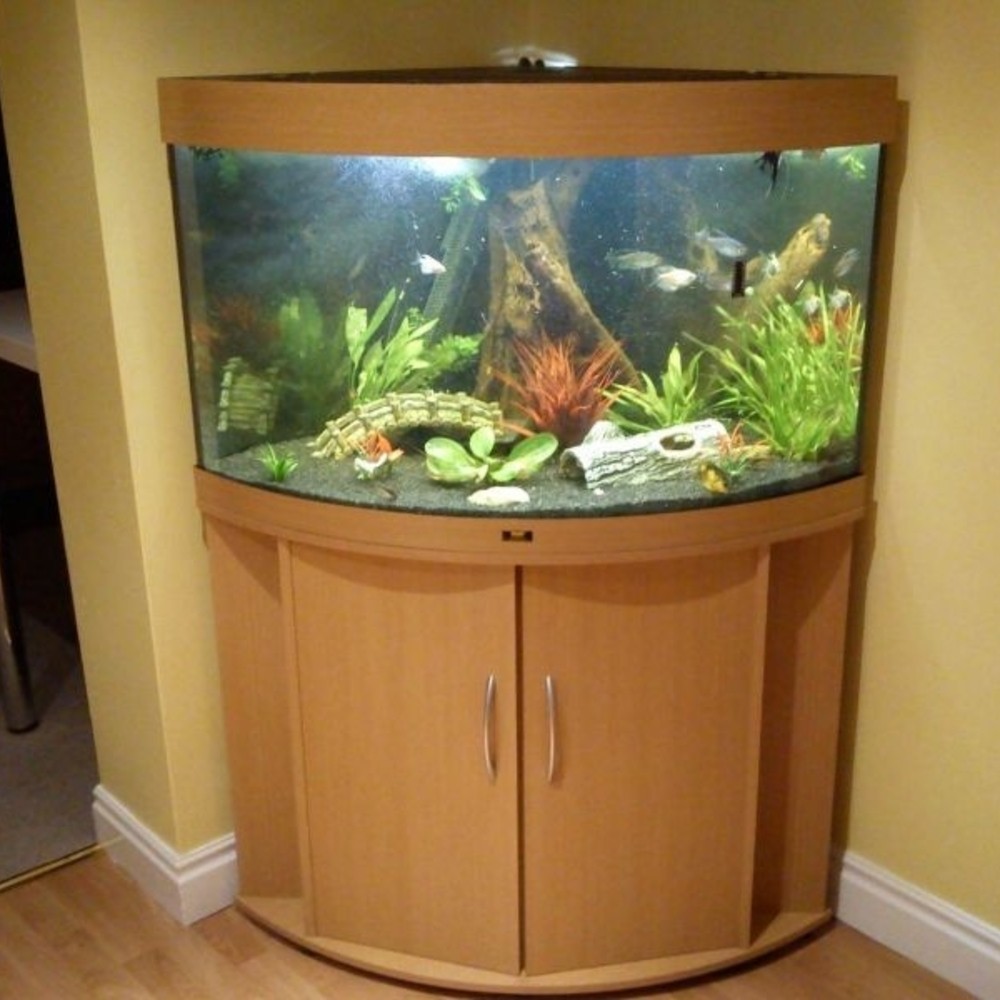
Credit: foter.com
Tools And Materials Needed
Building your own fish tank stand can be a fulfilling project, but before you dive in, it’s essential to have the right tools and materials. Here’s a list of what you need:
List Of Necessary Tools
- Jigsaw
- Drill
- Circular saw
- Table saw
- Tape measure
- Clamps
- Chisels
- Hammer
- Brad nailer/finish nailer
- Orbital sander
Detailed Information About Each Item’S Purpose In The Process
- Jigsaw: A jigsaw is crucial for cutting curves and rounding corners.
- Drill: You’ll need a drill for making starter holes and positioning screws.
- Circular saw: Circular saws are excellent for making straight cuts and can be adjusted to various depths.
- Table saw: A table saw is ideal for cutting larger pieces of wood, which saves you plenty of time and effort.
- Tape measure: Measuring accurately is essential in woodworking, and a tape measure is an indispensable tool for this purpose.
- Clamps: Clamps are necessary to hold your pieces of wood stationary while you’re cutting or driving screws into them.
- Chisels: You’ll need chisels for cleaning and flattening joints.
- Hammer: A hammer is essential for nailing and clamping.
- Brad nailer/finish nailer: Nailers make nailing quicker and more precise than using a hammer.
- Orbital sander: An orbital sander will give you a smooth, finished product and save you time compared to hand sanding.
Recommendations For Selecting The Best Quality Materials
Choosing the right materials will ensure your fish tank stand is sturdy and long-lasting. Here are some tips:
- Wood: When selecting wood, it’s important to choose durable, strong wood that can support your tank’s weight. Oak and maple are excellent options, and they look great too!
- Screws and nails: Always choose screws and nails that are appropriate for your wood’s thickness and strength.
- Glue: When joining pieces of wood together, choose high-quality, waterproof glue for a sturdy hold.
- Finish: A protective finish will make your stand look great and last longer. Choose a water-resistant finish that complements your room’s decor.
By ensuring that you have all the necessary tools and materials, you’ll be able to create a beautiful, sturdy fish tank stand. Now that you have everything you need, it’s time to get started!
Building The Base Frame
Steps To Assemble The Base Frame
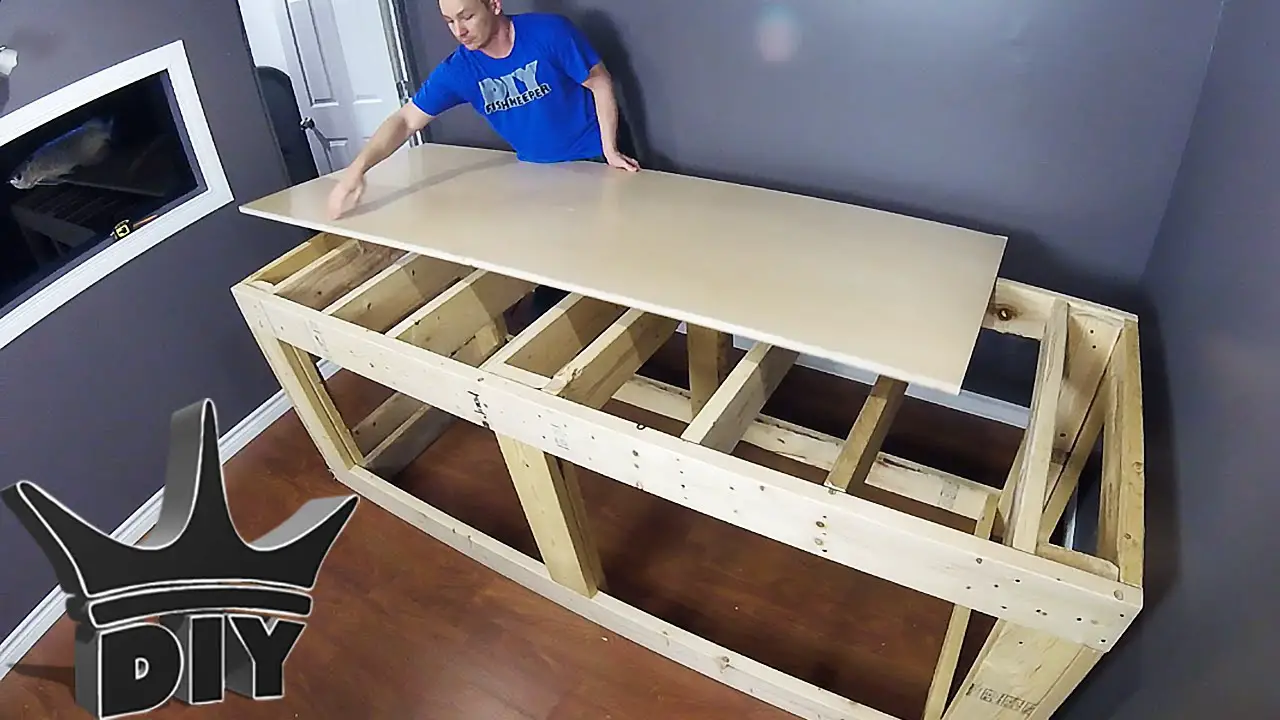
To build a sturdy and secure 125-gallon fish tank stand, you must start with building the base frame. Here are the essential steps for assembling the base frame:
- Cut the wood pieces to the right size using a saw. Ensure that you measure all the pieces twice to avoid misunderstandings.
- Sand all edges to remove sharpness and splinters, making them smooth to the touch.
- Drill pilot holes using a drill and countersink the holes to make room for wood screws.
- Assemble the base frame side panels by placing the 2x4s on the ground and securing them using wood screws, making sure that they are flush with the ground.
- Next, connect the two side panels using longer 2x4s and screws to build the base frame’s length and width. Make sure to use the precision square tool to keep the structure square.
- Finally, attach leg posts in each corner using wood screws and secure them with metal l-brackets. Double-check that the legs are plumb using a level to ensure the tank stands evenly.
Tips And Tricks To Ensure A Sturdy And Secure Result
Following these tips and tricks will guarantee the achievement of a sturdy and secure base frame:
- Choose pressure-treated lumber or oak wood as they are sturdy, durable, and water-resistant, which will make a perfect base for the fish tank.
- Reinforce the base frame with extra crossbars to provide additional support. Crossbars will also prevent the frame from sagging under the weight of the fish tank.
- Make sure to bolt the stand into the wall securely.
- Work with someone as it will help you maneuver the wood pieces around while assembling them, and somebody can help hold the frame in place while you secure the legs.
- Don’t hurry through the project, take your time and ensure that everything is precise and accurate.
Importance Of Proper Measurements
Building a fish tank stand requires precise and accurate measurements to build a sturdy base. The correct measurements ensure that the stand supports the weight of the fish tank and remains level on any surface. Here are some reasons why correct measurement is essential:
- The wrong measurement can make the stand unstable, leading to the fish tank crashing, which could be disastrous for both you and the fish.
- Perfect measurements guarantee the equal distribution of weight, which stops the frame from bowing or collapsing.
- Precise measurements enable the fish tank to be leveled and aligned correctly, and this is crucial as tanks need to be entirely level to prevent undue stress on glass joints.
Building a 125-gallon fish tank stand requires a sturdy base frame that is correctly assembled, reinforced, and level. Proper measurements combined with the tips and tricks we’ve listed will ensure that you build a stand that will support your tank securely.
Constructing The Legs
The legs serve as the foundation of your fish tank stand, which makes them crucial. A sturdy stand means a happy home for your aquatic pets. Here are some techniques for crafting the legs:
Techniques For Crafting The Legs
- Use good quality lumber, preferably hardwood like oak or maple, for sturdy legs that can support the weight of the tank.
- Cut the lumber to the required height and thickness with a saw. Sand the surfaces until they are smooth.
- Join the pieces together using either a mortise and tenon joint or dowels. Reinforce the joints with wood glue to make sure they are secure.
- Finish the legs with a coat of paint or varnish to protect them from moisture.
Now that you have crafted sturdy legs, it is essential to position them correctly to ensure that the stand is stable. Here are the essential factors to consider for positioning the legs:
Factors To Consider For Positioning The Legs
- Measure the dimensions of your fish tank carefully to determine the position of the legs.
- Make sure the legs are evenly spaced to distribute the weight of the tank evenly across the stand.
- Position the legs against the wall to prevent tilting and wobbling.
- If using carpeting, ensure that the legs are placed on the hard surface, or use leg levelers to adjust the height of each leg.
However, having sturdy and well-positioned legs is not enough. It is essential to match the dimensions of the legs with the size of the tank to ensure that the stand can support its weight without bending or breaking. Here’s how you can do it:
Matching Dimensions With The Size Of The Tank
- Measure the length and width of the tank and add an inch or two to each dimension to determine the required width and length of the stand.
- Ensure the legs are tall enough to elevate the tank to eye level comfortably, but not so tall that the stand is too unstable.
- Use a cross-bracing technique, such as x-bracing or h-bracing, to reinforce the legs and distribute the weight evenly across the stand.
By following these techniques and factors, you can build sturdy legs that correctly support the dimensions of your fish tank stand.
Attaching The Sides And Shelves
Building a fish tank stand may seem like a daunting task, but with the right guide and tools, it can be a fun and rewarding experience. In this section, we will guide you through the process of attaching sides and shelves of a 125-gallon fish tank stand.
Instructions For Attaching The Sides And Shelves
To attach the sides and shelves of the fish tank stand, follow these instructions:
- Start by attaching the top and bottom panels of the stand to the sides, ensuring that they are flush.
- Use a drill to make pilot holes for the screws and bolts. Make sure that the holes are in line with each other.
- Securely fasten the screws and bolts into the pilot holes, using a wrench to tighten them.
- Repeat the process of attaching the sides and shelves until all of them are firmly in place.
Choosing The Right Screws And Bolts
Choosing the right screws and bolts is crucial for building a sturdy fish tank stand. Here are some points to consider:
- Use screws and bolts that are suitable for the type of wood you are using. If you are unsure, consult with a hardware store expert.
- Make sure that the screws and bolts are long enough to go through both pieces of wood, as well as any supports or braces.
- Use corrosion-resistant screws and bolts to prevent rust and corrosion that can weaken the structure over time.
How To Add Extra Support
Adding extra support to your fish tank stand will ensure its long-lasting durability. Here’s how to do it:
- Install corner braces between the sides and shelves with screws or bolts for added strength and stability.
- Add cross braces on the back of the stand to prevent any wobbling. Nails or screws can be used to attach these.
- Use a level to ensure the stand is completely even and adjust accordingly.
By following these instructions and tips, you can successfully attach the sides and shelves of your 125-gallon fish tank stand with ease. Remember to choose the right screws and bolts, add extra support, and measure it correctly for the perfect fit.
Happy building!
Sanding And Finishing The Stand
Building a fish tank stand can be an exciting weekend project for fish enthusiasts, especially when you add personal touches of creativity and functionality. Sanding and finishing the stand may not be as exciting as designing it, but it’s critical to ensure the durability and longevity of the stand.
In this section, we’ll provide a detailed guide on how to sand and finish the stand, the importance of proper preparation, and the best finish options for long-term durability.
Detailed Guide On The Sanding And Finishing Process
Sanding and finishing are essential in creating a uniform texture and surface for painting or staining the stand. Follow these simple steps to sand and finish a fish tank stand:
- Begin by wiping down the entire stand with a damp cloth to remove any dirt and debris.
- Once the stand is dry, use a coarse-grit sandpaper (80 to 100 grit) to sand the entire surface of the stand. This will remove any rough spots, stains, or varnish.
- Once the entire stand has been sanded with coarse sandpaper, use a finer sandpaper (150 grit) to sand the entire surface again. This will smooth out any remaining rough spots.
- After sanding the entire stand, wipe it down with a tack cloth or a sticky roller to remove any dust or debris.
- Now it’s time to apply the finish. You can either paint or stain the stand depending on your preference.
Importance Of Proper Preparation
Before you sand and finish the stand, it’s important to ensure that you prepare the surface well. Proper preparation ensures that the finish adheres well, creating a durable, long-lasting finish.
- Begin by removing any stickers or adhesive from the surface of the stand. You can use a heat gun or adhesive remover to do this.
- Next, fill in any cracks or holes on the surface of the stand using wood filler. Let it dry according to the manufacturer’s instructions, and sand it down to ensure it’s level with the rest of the surface.
- Sand the entire surface of the stand to remove any rough spots, stains, or varnish. This helps ensure that the finish adheres well, creating a durable, long-lasting finish.
Application Of The Best Finish Option For Long-Term Durability
Selecting the right finish for your fish tank stand is vital in ensuring its longevity and durability. Here are some of the best finishes you can use:
- Paint: A paint finish provides more coverage and protection against water spills, scratches, and marks. Use a primer before painting for better adhesion.
- Stain: A stain finish enhances the natural beauty of wood while providing some protection against water and moisture.
- Polyurethane: This clear finish provides excellent protection against scratches and moisture, making it an ideal choice for a fish tank stand.
Remember, the key to a successful finish is in the preparation and proper application. Follow the guidelines carefully and take your time with each step. With a little patience and care, you will have a beautiful and durable fish tank stand that will last for years to come.
Frequently Asked Questions Of How To Build A 125 Gallon Fish Tank Stand
What Materials Do I Need To Build A 125-Gallon Fish Tank Stand?
You would need to have 4×4 wooden posts, plywood, screws, bolts, saw, and a drill to construct a sturdy and strong fish tank stand.
What Is The Best Wood To Use To Build A Fish Tank Stand?
Any sturdy wood type like oak, maple, or birch can be used to build a fish tank stand due to their strength and durability. Choose wood that has no cracks, knots, or splits.
How High Should My Fish Tank Stand Be?
The height of your fish tank stand should be at least a foot taller than your fish tank and comfortable for viewing and maintenance.
Do I Need To Stain Or Varnish My Fish Tank Stand?
Staining or varnishing your fish tank stand not only makes it look good but also protects it from moisture. You can add a protective coat or paint to match the surrounding décor.
Conclusion
Creating a 125-gallon fish tank stand may seem daunting, but with the right tools, materials, and a little bit of patience, it can be done. The most important things to consider when building a fish tank stand are stability, strength, and functionality.
By following the step-by-step instructions discussed in the blog post, you can construct a sturdy and stylish stand that will safely support your fish tank and other aquarium equipment. Aside from being a practical diy project for fish enthusiasts, building a fish tank stand provides a sense of satisfaction and accomplishment that comes from making something with your own hands.
Whether you’re an experienced diyer or a beginner, building a 125-gallon fish tank stand is a gratifying activity that can also help you save a considerable amount of money in the long run. Don’t hesitate, get started on building your very own fish tank stand today!
